marie callender chicken pot pie instructions

Marie Callender Chicken Pot Pie instructions provide guidance on cooking methods and safety precautions for a delicious meal‚ using a food thermometer and cookie sheet effectively always.

Overview of the Product

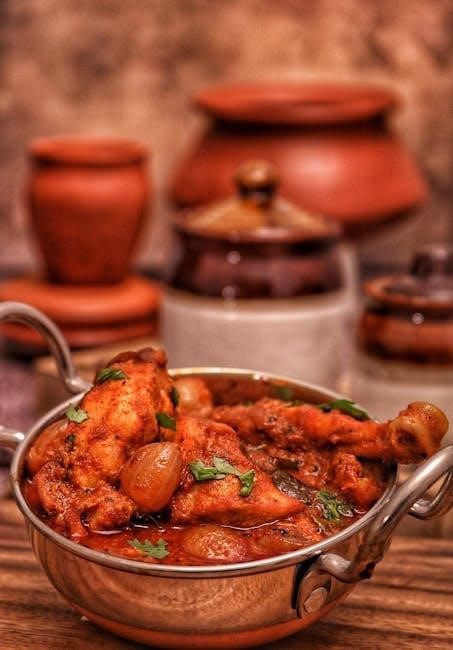
Marie Callender Chicken Pot Pie is a frozen meal featuring chunks of tender white meat chicken and garden vegetables in a golden‚ flaky crust made from scratch. The product is made with wholesome ingredients and no artificial flavors‚ colors or preservatives‚ containing 11 grams of protein per serving. This frozen pot pie offers a warm‚ savory taste and is perfect for quick meals‚ whether feeding oneself or the whole family. The product is available in a 10 oz size and can be heated in the microwave or conventional oven‚ providing a convenient and easy-to-prepare meal option. With its delicious ingredients and straightforward cooking instructions‚ Marie Callender Chicken Pot Pie is a great choice for those looking for a satisfying and hassle-free meal. The product’s quality and taste make it a popular option among consumers.

Ingredients and Nutritional Information

Marie Callender Chicken Pot Pie contains chunks of tender white meat chicken and garden vegetables in a golden‚ flaky crust made from scratch. The product is made with wholesome ingredients‚ including chicken‚ vegetables‚ and a flaky crust‚ with no artificial flavors‚ colors or preservatives. Each serving of the pot pie contains 11 grams of protein‚ making it a good source of nutrition. The ingredients and nutritional information are carefully selected to provide a balanced and satisfying meal. The product’s nutritional content is designed to meet the needs of consumers looking for a convenient and healthy meal option. With its wholesome ingredients and balanced nutritional profile‚ Marie Callender Chicken Pot Pie is a great choice for those seeking a delicious and nutritious meal. The product’s ingredients and nutritional information are clearly listed on the packaging for consumer reference.

Cooking Instructions for Marie Callender Chicken Pot Pie

Cooking methods include microwave and conventional oven for a delicious meal always.

Microwave Cooking Instructions

To cook Marie Callender Chicken Pot Pie in the microwave‚ first tear off the top completely to ensure even heating. Place the pie in the microwave and cook on high for a specified amount of time‚ checking the packaging for exact instructions. It is essential to check that the food is cooked thoroughly before eating‚ as undercooked or raw ingredients can be harmful. The microwave cooking method is a quick and convenient way to prepare the pot pie‚ but it requires attention to the cooking time and temperature to achieve the best results. By following the microwave cooking instructions‚ you can enjoy a delicious and satisfying meal. The microwave method is also a great option for those with limited time or who prefer a faster cooking method. Always follow the recommended cooking time and check the pie for doneness.

Conventional Oven Cooking Instructions

To cook Marie Callender Chicken Pot Pie in a conventional oven‚ preheat the oven to a specified temperature‚ usually around 375 degrees Fahrenheit. Place the pie on a cookie sheet to prevent damage to the oven and ensure even cooking. The cookie sheet also helps to catch any spills or overflow from the pie. Cook the pie for a recommended amount of time‚ usually around 25-35 minutes‚ or until the crust is golden brown and the filling is hot and steaming. It is essential to follow the recommended cooking time and temperature to achieve the best results. The conventional oven method allows for a crispy crust and a hot‚ satisfying filling‚ making it a great option for those who prefer a more traditional cooking method. Always follow the recommended cooking instructions for best results.

Important Safety Precautions

Follow safety guidelines when cooking to avoid accidents and ensure food safety always and properly.

Internal Temperature Requirements

To ensure food safety‚ it is essential to check the internal temperature of the pot pie. The internal temperature needs to reach 165 degrees F‚ as measured by a food thermometer in several spots. This is a critical step in the cooking process‚ and it should not be overlooked. Using a food thermometer is the most accurate way to determine if the pot pie is cooked thoroughly. The temperature should be checked in the center of the pie‚ as well as in other areas‚ to ensure that it has reached a safe minimum internal temperature. By following this step‚ you can enjoy a delicious and safe meal‚ and it is a crucial part of the cooking instructions for Marie Callender Chicken Pot Pie. Proper temperature control is vital for food safety and quality.

Crust Appearance and Steam

The crust of the pot pie should be golden brown‚ which indicates that it is cooked thoroughly. Additionally‚ steam should rise from the filling‚ which is another sign that the pot pie is hot and ready to eat. The crust appearance and steam are important indicators of the pot pie’s doneness‚ and they should be checked in conjunction with the internal temperature. A golden brown crust and rising steam are signs of a well-cooked pot pie‚ and they can be used to verify that the pot pie is cooked to a safe internal temperature. The combination of these signs ensures that the pot pie is both safe to eat and delicious. By checking the crust appearance and steam‚ you can enjoy a satisfying and enjoyable meal. Proper cooking is essential for a great dining experience.

Potential Issues and Solutions

Issues with orders can be reported through the Instacart app or website for assistance always.

Reporting Issues with Orders

Issues with orders can be reported through the Instacart app or website for assistance and support. The reporting process allows customers to notify Instacart of problems with their orders‚ including missing items‚ incorrect items‚ damaged items‚ poor replacements‚ and early or late orders. Customers can also reach out to Instacart Customer Experience for help with resolving issues. This process helps to ensure that customers receive the correct orders and provides an opportunity for Instacart to improve their services. By reporting issues‚ customers can help Instacart to identify and address problems‚ leading to a better overall experience. The reporting process is an important part of the Instacart service‚ providing customers with a convenient and effective way to resolve issues with their orders. This helps to build trust and confidence in the Instacart service.

Customer Support

Customer support is available to assist with any questions or concerns about Marie Callender Chicken Pot Pie instructions. The Instacart Customer Experience team is dedicated to providing helpful and courteous support to ensure a positive experience. Customers can reach out to the team for assistance with ordering‚ cooking‚ or any other aspect of the product. The customer support team is knowledgeable and trained to address a wide range of topics‚ from cooking methods to nutritional information. By providing excellent customer support‚ Instacart aims to build trust and loyalty with its customers‚ ensuring that they have a satisfying experience with Marie Callender Chicken Pot Pie and other products. The customer support team is an essential part of the overall service‚ providing valuable assistance and guidance to customers. This support is available through various channels‚ including phone‚ email‚ and online chat.

Additional Cooking Tips

Cooking tips include using a cookie sheet and tearing off the top for effective microwave cooking methods always.

Using a Cookie Sheet

To ensure safe and effective cooking‚ it is recommended to use a cookie sheet when baking Marie Callender Chicken Pot Pie in a conventional oven. This helps to prevent damage to the tray and oven. The cookie sheet provides a flat surface for the pot pie to cook on‚ allowing for even heat distribution and preventing the crust from becoming misshapen. By using a cookie sheet‚ you can also prevent spills and messes in the oven. It is an important step in the cooking process‚ and it can help to achieve a golden brown crust and a delicious‚ flaky texture. Proper use of a cookie sheet can make a big difference in the quality of the final product‚ and it is a simple step to follow for a perfect meal. Cooking with a cookie sheet is easy and convenient.

Tearing Off the Top

Before microwaving Marie Callender Chicken Pot Pie‚ it is essential to tear off the top completely. This step is crucial for safe and even cooking. Tearing off the top allows steam to escape‚ preventing the crust from becoming soggy or unevenly cooked. It also helps to prevent the filling from splattering or overflowing during cooking. By tearing off the top‚ you can ensure that the pot pie cooks thoroughly and evenly‚ resulting in a delicious and satisfying meal. The microwave cooking instructions provided emphasize the importance of tearing off the top to achieve the best results. Following this step can make a significant difference in the quality of the cooked pot pie‚ and it is a simple step to follow for a perfect meal‚ every time‚ with a delicious and flaky crust. Proper preparation is key to a great dining experience.

mohawk laminate flooring installation instructions

Mohawk laminate flooring installation begins with planning and preparation using online resources and guides, including videos and documents, to ensure a successful project with professional results always․

Overview of Mohawk Laminate Flooring

Mohawk laminate flooring is a popular choice for homeowners due to its durability and versatility․ It is available in a variety of colors and styles, including faux woods and marble designs․ The flooring is designed to mimic the look and feel of natural materials, making it a great option for those who want a high-end look without the high cost․ Mohawk laminate flooring is also easy to maintain and can withstand heavy foot traffic, making it a great choice for busy households․ With its wide range of styles and colors, Mohawk laminate flooring can complement any decor, from traditional to modern․ The flooring is also resistant to scratches and fading, ensuring that it will look great for years to come․ Overall, Mohawk laminate flooring is a great option for anyone looking for a durable and stylish flooring solution․ It offers a unique combination of style and practicality․

Importance of Choosing the Right Flooring

The right flooring can greatly impact the look and feel of a room, and choosing the wrong type can lead to disappointment and regret․ Flooring is a significant investment, and it’s essential to consider factors such as lifestyle, budget, and personal taste when making a decision․ The wrong flooring can also lead to maintenance and repair issues, which can be costly and time-consuming․ On the other hand, choosing the right flooring can enhance the beauty and functionality of a room, making it a comfortable and enjoyable space to live in․ A well-chosen floor can also increase the value of a property, making it a worthwhile investment․ By considering the importance of choosing the right flooring, homeowners can make an informed decision that meets their needs and enhances their living space․ This decision can have a lasting impact on the overall look and feel of a home․

Pre-Installation Requirements

Subfloor preparation is crucial for successful installation using specific tools and materials always․

Tools and Materials Needed

To ensure a successful installation, it is essential to have the right tools and materials․ A level or string is necessary to validate the flatness of the subfloor․ A moisture test kit is also required for concrete subfloors․ Additionally, a power saw with carbide tips is recommended for cutting the laminate flooring, and a jigsaw may be needed for difficult cuts․ Other necessary tools include a tapping block, a pull bar, and a rubber mallet․ It is also important to have a notched trowel and a vacuum cleaner to clean the subfloor․ Furthermore, it is crucial to have all the necessary materials, such as underlayment, transition strips, and baseboards, to complete the installation․ By having all the necessary tools and materials, you can ensure a professional-looking installation and avoid any potential problems․ Proper preparation and having the right tools and materials will make the installation process much easier and less stressful․

Acclimation of Laminate Flooring

Acclimation of laminate flooring is a crucial step in the installation process․ It is recommended to allow the laminate flooring to acclimate inside a climate-controlled area for at least 24 hours before installation․ This allows the flooring to adjust to the temperature and humidity of the room, reducing the risk of shrinkage or expansion after installation․ The acclimation process should take place in the same room where the flooring will be installed, and the flooring should be kept in its original packaging until installation․ It is also important to maintain a consistent temperature and humidity level during the acclimation period․ By allowing the laminate flooring to acclimate properly, you can ensure a successful installation and prevent any potential problems․ Proper acclimation is essential for a durable and long-lasting flooring installation․ The acclimation process is a critical step that should not be overlooked․

Installation Techniques and Tips

Proper installation techniques and tips are essential for a successful Mohawk laminate flooring project with professional results always using online guides․

Proper Installation Techniques

To ensure a successful Mohawk laminate flooring installation, it is essential to follow proper installation techniques․ This includes acclimating the flooring to the installation environment, preparing the subfloor, and using the correct tools and materials․ The flooring should be installed in a way that allows for expansion and contraction, and the planks should be locked together securely․ It is also important to follow the manufacturer’s instructions and recommendations for installation․ Additionally, the installation should be done in a way that ensures the flooring is level and even, and that the joints are tight and secure․ By following these proper installation techniques, you can ensure a professional-looking and long-lasting Mohawk laminate flooring installation․ The use of online guides and videos can also provide helpful tips and techniques for a successful installation․ Proper installation techniques are crucial for a beautiful and durable floor․

DIY Installation Support

For homeowners who want to install their Mohawk laminate flooring themselves, there are many resources available to provide DIY installation support․ Online guides and videos can walk you through the installation process step-by-step, and provide helpful tips and tricks for a successful installation․ Many manufacturers also offer customer support and technical assistance to help with any questions or issues that may arise during the installation process․ Additionally, many home improvement stores and flooring retailers offer installation classes and workshops to help homeowners learn the skills they need to install their flooring successfully․ With the right tools and materials, and a little bit of guidance and support, many homeowners are able to install their Mohawk laminate flooring themselves and achieve professional-looking results․ By taking advantage of these DIY installation support resources, homeowners can save money and feel a sense of pride and accomplishment in their work․

Additional Resources

Visit mohawkflooring․com for guides, videos, and FAQs on installation, maintenance, and repair of Mohawk laminate flooring products always available online now․

Online Resources and Tutorials

Mohawk flooring website offers a wide range of online resources and tutorials to help with laminate flooring installation, including videos, guides, and FAQs․ The website provides step-by-step instructions on how to install Mohawk laminate flooring, as well as tips and tricks for a successful installation․ Additionally, the website offers a variety of tutorials on different aspects of laminate flooring installation, such as preparing the subfloor, laying the flooring, and finishing the edges․ The online resources and tutorials are designed to be easy to follow and understand, making it possible for DIY installers to achieve professional-looking results․ By utilizing these online resources, homeowners can ensure a successful installation and enjoy their new Mohawk laminate flooring for years to come․ The website is user-friendly and easy to navigate, allowing users to quickly find the information they need to complete their installation project․

Professional Installation Help

For those who prefer to leave the installation to the experts, Mohawk offers professional installation help․ The company has a network of certified installers who are trained to install Mohawk laminate flooring to the highest standards․ These professionals have the necessary skills and experience to ensure a successful installation, and they can provide guidance on the best way to install the flooring in a particular room or space․ By hiring a professional installer, homeowners can enjoy the benefits of Mohawk laminate flooring without the hassle and risk of DIY installation․ The professional installation help service is designed to provide peace of mind and ensure that the flooring is installed correctly and efficiently․ The installers use the latest techniques and equipment to ensure a high-quality finish, and they can also provide advice on maintenance and upkeep to ensure the flooring lasts for years to come․

sully shoulder brace instructions

Sully Shoulder Brace Instructions: A Comprehensive Guide

Suffering from a shoulder injury can be debilitating, hindering daily activities and athletic performance․ This guide provides comprehensive instructions on using the Sully Shoulder Brace effectively․ Learn how to apply, adjust, and maintain your brace!

The Sully Shoulder Brace is a valuable tool for individuals seeking support and stability for their shoulder joint, designed to stabilize, assist or restrict movement of the shoulder post-injury and post-operatively․ Whether you’re recovering from a dislocation, subluxation, or simply need extra support during physical activity, understanding how to use the Sully brace correctly is crucial․ This comprehensive guide will walk you through the process, ensuring optimal comfort and effectiveness․

Proper application of the Sully brace can significantly reduce the risk of further injury and promote healing․ We’ll cover everything from positioning the brace correctly to adjusting the straps for a secure and comfortable fit․ Furthermore, this will help you to maximize comfort while wearing it․

Understanding the Sully Shoulder Brace

Before diving into the application process, understanding the brace’s purpose and benefits is essential․ Let’s explore the intended uses and advantages of choosing a Sully brace over other support methods․

Intended Use and Indications

The Sully Shoulder Brace is designed to stabilize, assist, or restrict movement of the shoulder, post-injury or post-operatively․ It is commonly indicated for shoulder dislocations, subluxations, rotator cuff injuries, and other conditions requiring controlled shoulder movement․ The brace aims to minimize further injury and promote healing by providing support and limiting excessive motion․ It’s crucial to consult with a medical professional to determine if a Sully brace is appropriate for your specific condition and to receive guidance on its proper use․

The brace can be beneficial during the rehabilitation process, allowing for a gradual return to activity while protecting the injured shoulder․ Furthermore, individuals engaging in sports or activities that place the shoulder at risk may use the Sully brace as a preventative measure․ Remember, the brace is a tool intended to aid in recovery and protection․

Advantages of Wearing a Sully Brace vs․ Taping

While both shoulder taping and a Sully brace offer support, key differences exist․ A Sully brace provides consistent, adjustable support, unlike taping which can loosen or lose effectiveness over time․ Braces are reusable and offer a more cost-effective solution long-term․ Applying a brace is typically easier and faster compared to the specialized skill needed for effective taping․

Furthermore, a Sully brace allows for controlled range of motion, which is crucial during rehabilitation․ Taping may limit movement more rigidly․ The adjustability of a brace ensures a customized fit and support level, accommodating changes in swelling or activity level․ Finally, braces are often more durable and can withstand rigorous activity better than tape, making them ideal for sports․

Applying the Sully Shoulder Brace: Step-by-Step Instructions

Proper application is crucial for optimal support and comfort․ Follow these steps carefully to ensure the Sully brace effectively stabilizes your shoulder and aids in your recovery process․

Positioning the Brace

Begin by identifying the affected shoulder․ The Sully brace is designed for either the left or right shoulder․ Next, gently slide your arm into the arm cuff of the brace․ Ensure the cuff sits comfortably around your upper arm, just above the elbow․ It should feel snug but not constricting․

The brace should be positioned so that the main support structure is correctly aligned with your shoulder joint․ This alignment is critical for the brace to provide the necessary stabilization and support․ Double-check that the brace isn’t twisted or misaligned before proceeding to the next step․

Take a moment to ensure the arm cuff isn’t too tight, which could restrict circulation, or too loose, which would compromise the brace’s effectiveness․ Proper positioning is the foundation for a comfortable and supportive fit․

Securing the Arm Cuff

Once the brace is correctly positioned, the next crucial step involves securing the arm cuff․ Locate the hook-and-loop strap attached to the arm cuff․ This strap is designed to provide a secure and adjustable fit around your upper arm․

Wrap the strap snugly around your arm, ensuring it fastens securely to the corresponding hook-and-loop closure on the cuff․ The strap should be tight enough to prevent the brace from shifting during movement, but not so tight that it restricts circulation or causes discomfort․

Pay attention to any areas where the cuff might be digging into your skin․ If necessary, readjust the position of the cuff slightly to alleviate pressure points․ A properly secured arm cuff is essential for maintaining the brace’s stability and effectiveness throughout the day․

Adjusting the Straps for Optimal Support

Achieving optimal support from your Sully Shoulder Brace hinges on correctly adjusting the straps․ These straps play a vital role in stabilizing the shoulder joint and restricting unwanted movements․ Start by identifying the primary straps responsible for controlling abduction and external rotation․

Tighten or loosen these straps to achieve the desired level of support, ensuring that your shoulder feels secure and protected․ If you are unsure about the appropriate tension, consult with a healthcare professional or athletic trainer․

Remember to check for any areas of excessive pressure or discomfort․ The straps should provide firm support without causing pain or restricting circulation․ Make small adjustments as needed until you find the perfect balance between stability and comfort․

Maximizing Comfort While Wearing the Sully Brace

While the Sully Brace is designed for support, comfort is equally crucial for consistent use․ Start by ensuring the brace fits snugly but isn’t overly tight, preventing chafing or pressure sores․ Wear a thin, moisture-wicking layer beneath the brace to minimize skin irritation․

Pay close attention to strap placement․ Straps should lie flat and not dig into your skin․ If you experience discomfort, readjust the straps slightly or add padding․ Regularly check your skin for any signs of redness or irritation, especially during prolonged wear․

Proper hygiene is essential․ Clean the brace according to the manufacturer’s instructions to prevent bacteria buildup․ Consider wearing the brace over clothing for extra comfort․ If pain persists, consult a healthcare professional․

Care and Maintenance of Your Sully Shoulder Brace

Proper care extends brace life and hygiene․ Regularly clean the brace following specific instructions․ This prevents bacteria buildup and ensures optimal performance․ Routine maintenance maximizes support and comfort․

Cleaning Instructions

Maintaining your Sully Shoulder Brace through proper cleaning is essential for hygiene and longevity․ Regularly cleaning your brace prevents the build-up of bacteria and odors, ensuring it remains comfortable and effective․ Before cleaning, always detach any removable pads or components as outlined in the manufacturer’s guidelines, if applicable․

For general cleaning, use mild soap and cold water․ Gently hand wash the brace, avoiding harsh detergents or bleach, which can damage the neoprene material․ Rinse thoroughly to remove all soap residue․ Do not wring or twist the brace, as this can distort its shape and compromise its supportive qualities․

Allow the brace to air dry completely, away from direct sunlight or heat, which can degrade the materials․ Ensure it’s fully dry before using or storing it to prevent mildew growth․ Periodically inspect the brace for any signs of wear and tear, addressing issues promptly to maintain its integrity․

Additional Resources

For further assistance and information regarding the Sully Shoulder Brace, explore online resources, consult medical professionals, or contact the manufacturer directly․ Ensure proper usage and care for optimal results․

Where to Find More Information and Support

Navigating a shoulder injury and understanding the proper use of a Sully Shoulder Brace can sometimes require additional guidance․ Several avenues exist to access more information and support․ Start by consulting with your physician or physical therapist; they can provide personalized advice based on your specific condition and needs․

Online resources, such as the manufacturer’s website (e․g․, DJO Global for the DonJoy Sully Brace), often offer detailed instructions, FAQs, and video tutorials․ Look for reputable medical websites and forums where users share experiences and tips; Remember to verify the credibility of online information with your healthcare provider․

Local orthopedic clinics or sports medicine centers may host workshops or provide educational materials on shoulder injuries and brace usage․ Connecting with support groups, either in person or online, can offer valuable peer support and shared experiences․ Don’t hesitate to reach out to these resources for comprehensive assistance․