Crochet enthusiasts are discovering numerous free instructions for crafting stunning American flag designs! Patterns range from blankets to appliqués, offering patriotic projects for all skill levels․
Lovable Loops and The Turtle Trunk provide accessible patterns, while Yarnspirations boasts a vast collection of free, easy-to-follow crochet guides․
Historical Significance of the American Flag in Crochet
Crocheted American flags represent a unique intersection of patriotic expression and fiber art tradition․ While the exact origins are difficult to pinpoint, the craft likely gained prominence during times of national pride and remembrance, such as wartime efforts․
The rise of accessible free crochet patterns in recent years has democratized this art form, allowing more individuals to create symbolic representations of the flag․ These handmade flags often become cherished heirlooms, embodying personal connections to American history and values․ The craft provides a tangible way to honor veterans and celebrate patriotic holidays․
Popularity of American Flag Crochet Projects
The surge in popularity of American flag crochet projects is fueled by the accessibility of free patterns and the desire for handmade patriotic décor․ Blankets, in particular, are a favored project, offering a substantial and visually impactful display of national pride․
Appliqués provide a versatile option for embellishing clothing or other items․ Online platforms like Lovable Loops and The Turtle Trunk contribute to this trend, offering easy-to-follow tutorials․ The craft’s appeal lies in its blend of creativity, affordability, and heartfelt symbolism․
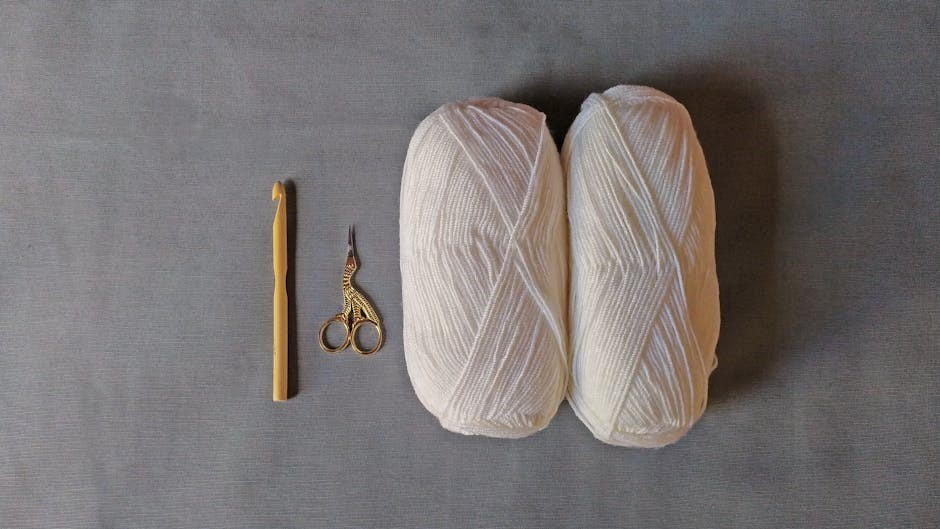
Materials Needed for American Flag Crochet
Crocheting an American flag requires red, white, and blue yarn, a suitable crochet hook, scissors, a yarn needle, and stitch markers for accurate pattern following․
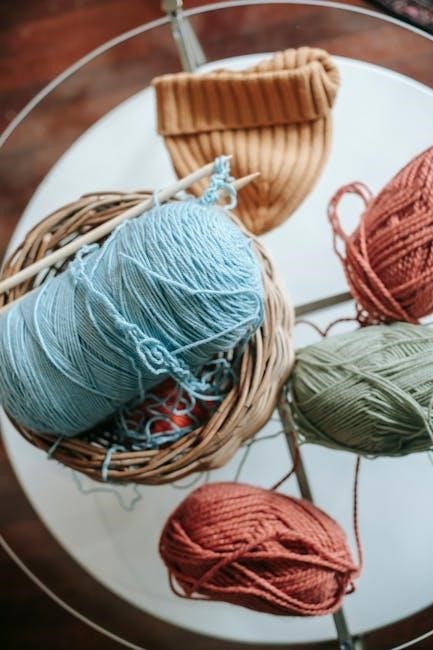
Yarn Choices (Red, White, and Blue)
Selecting the right yarn is crucial for a vibrant American flag․ Worsted weight cotton yarn is a popular choice for its stitch definition and durability, ideal for blankets and appliqués․
Acrylic yarn offers affordability and easy care, suitable for larger projects like afghans․ For a premium look, consider wool or a wool blend, though these may require more delicate handling․
Ensure your red, white, and blue shades complement each other; consider dye lots for consistency․ Many free patterns suggest specific yarn brands or weights for optimal results․
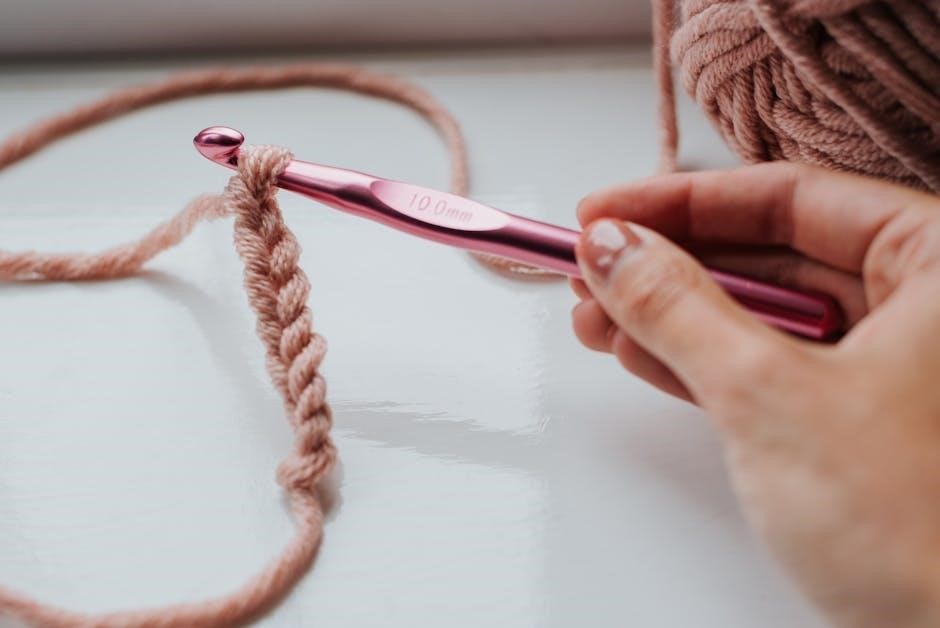
Crochet Hook Sizes
Choosing the correct crochet hook size is vital for achieving the desired fabric density and drape in your American flag project․ Most free patterns utilizing worsted weight yarn recommend a hook size H/8 (5․0 mm) or I/9 (5․5 mm)․
For lighter weight yarns, a smaller hook, such as a G/6 (4․0 mm), may be appropriate․ Conversely, bulkier yarns necessitate larger hooks, like a K/10․5 (6․5 mm)․
Always check the specific pattern instructions, as hook size significantly impacts gauge and the final appearance of your crochet work․
Other Essential Supplies (Scissors, Yarn Needle, Stitch Markers)
Beyond yarn and a crochet hook, several tools enhance the American flag crafting experience․ Sharp scissors are crucial for cleanly cutting yarn ends․ A yarn needle, also known as a tapestry needle, facilitates weaving in those ends for a polished finish․
Stitch markers prove invaluable for marking the beginning of rows, crucial points in patterns, or star placements․ These simple tools prevent errors and ensure accurate crochet work, especially with complex designs found in free instructions․
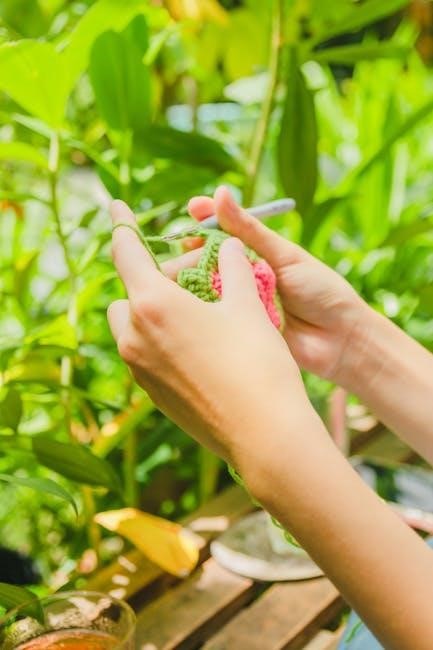
Basic Crochet Stitches Used
Free American flag crochet patterns commonly utilize fundamental stitches: the chain (ch), single crochet (sc), double crochet (dc), and slip stitch (sl st)․
Chain Stitch (ch)
The chain stitch is the foundation of most crochet projects, including American flag patterns․ It creates the initial chain, determining the width of your work․ Free patterns consistently begin with instructions to chain a specific number of stitches․
Mastering a consistent chain tension is crucial for even rows․ Tutorials emphasize keeping the chains loose enough to easily insert your hook in subsequent rows․ This basic stitch is essential for building the stripes and star field of the flag․
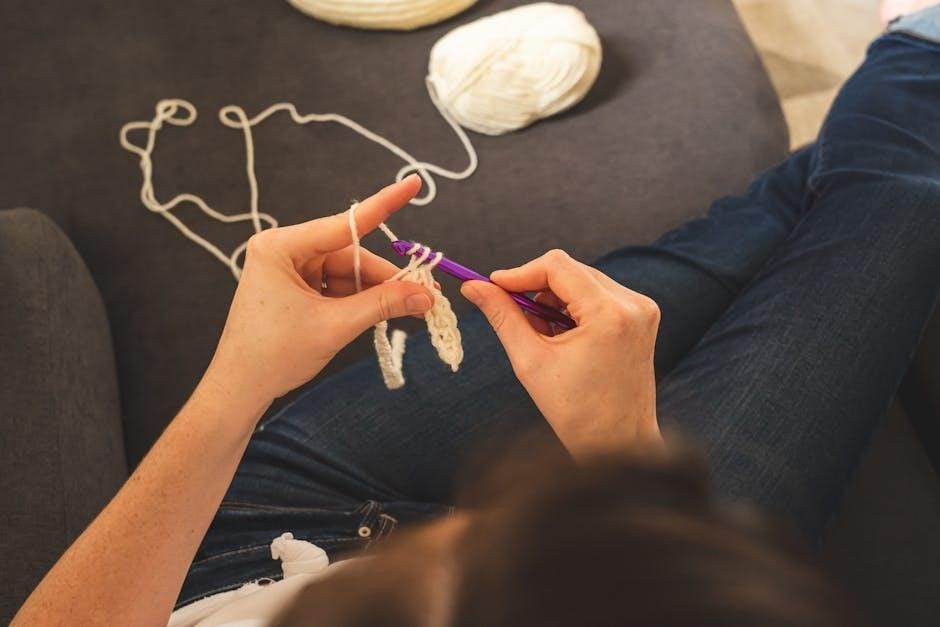
Single Crochet (sc)
Single crochet is a fundamental stitch frequently used in American flag crochet patterns, particularly for creating solid stripes and defining the edges of appliqués․ Many free instructions utilize this stitch for its dense fabric and simple execution․
Tutorials demonstrate inserting the hook, yarn over, pulling through a loop, and repeating․ Consistent single crochet creates a neat, uniform texture, ideal for the flag’s red and white stripes, ensuring a polished final product․
Double Crochet (dc)
Double crochet is another essential stitch in American flag crochet patterns, often employed for faster coverage in larger projects like blankets․ Free online instructions frequently showcase its use for creating the flag’s stripes and textured elements․
The stitch involves yarn over, inserting the hook, yarn over, pulling through loops, and yarn over, pulling through all loops on the hook․ It produces a taller stitch than single crochet, adding height and drape to the finished piece․
Slip Stitch (sl st)
The slip stitch is a foundational element in many free American flag crochet patterns, primarily used for joining rounds, finishing off edges, or creating a neat border․ Tutorials emphasize its simplicity – inserting the hook, yarn over, and pulling directly through both loops on the hook․
While it doesn’t add height, the slip stitch provides a secure and almost invisible join, crucial for a polished look in patriotic crochet projects․

Free American Flag Crochet Patterns: Overview
Free crochet instructions abound for American flag projects! Explore blankets, appliqués, and shawls, readily available from sites like Lovable Loops and Yarnspirations․
Blanket Patterns
Free crochet blanket patterns celebrating the American flag are incredibly popular! The Turtle Trunk offers a detailed chevron design, perfect for showcasing patriotic pride․ Many crafters enjoy creating afghans with ribbed stitches, mimicking the flag waving in the breeze․
Other free patterns include options for heirloom-quality afghans and smaller “fridgie” sized flags․ These blankets range in complexity, catering to both beginner and experienced crocheters seeking a rewarding project․ Yarnspirations also provides numerous free blanket patterns․
Applique Patterns
Free crochet American flag appliqué patterns are ideal for embellishing garments, bags, or quilts! Lovable Loops provides a quick and easy-to-follow pattern, perfect for beginners․ These appliqués allow for versatile patriotic accents on various projects․
Crafters can find instructions for creating the flag shape and stars using different techniques․ Appliqués offer a smaller-scale project, requiring less yarn and time, while still delivering a striking patriotic design․ Many tutorials are available online to guide the process․
Shawl Patterns
Discover beautiful free crochet American flag shawl patterns for a stylish patriotic accessory! Cheryl Miller’s design offers a stunning overlay mosaic technique, utilizing US crochet terms for clear instructions․ These shawls are perfect for showcasing national pride with elegance․
Free flow designs create a visually appealing drape, while the mosaic pattern adds texture and interest․ Shawl projects provide a wearable expression of patriotism, suitable for various occasions and weather conditions․ Explore available tutorials for guidance․
Detailed Pattern: Chevron American Flag Blanket
Free instructions from The Turtle Trunk detail a chevron American flag blanket, featuring ribbed stitches mimicking a waving flag․ Calculate size and yarn needs carefully!
Calculating Blanket Size and Yarn Requirements
Determining blanket dimensions is crucial․ Consider desired finished size – baby, throw, or queen․ The chevron pattern impacts yarn usage; larger blankets require significantly more․ The Turtle Trunk’s pattern doesn’t specify exact amounts, necessitating calculation based on gauge and size․
Generally, worsted weight yarn is recommended․ Estimate red and white yarn equally, with less blue for the star field․ Always purchase extra yarn to avoid dye lot discrepancies mid-project․ Swatching is vital to confirm gauge and refine yarn estimates for a flawless, patriotic finish!
Instructions for the Chevron Stripes
The chevron effect is achieved through increasing and decreasing rows of double crochet stitches․ Begin with a foundation chain, then work rows creating angled stripes․ The Turtle Trunk pattern utilizes a repeating sequence of increases and decreases to form the “V” shape․
Alternate red and white stripes, maintaining consistent tension for evenness․ Careful stitch counting is essential to prevent distortion․ Blocking the finished blanket will further refine the chevron’s shape, resulting in a crisp, professional-looking American flag design․
Creating the Star Field
The star field presents a delightful challenge! Several methods exist for crocheting the stars․ Some patterns suggest individual star appliques, attached securely to a blue background․ Others utilize clever stitch techniques to form stars directly within the crochet fabric․
Free patterns often offer detailed instructions for both approaches․ Precise star placement is crucial for accuracy․ Consider using stitch markers to maintain alignment․ Blocking the star field ensures a neat, symmetrical appearance, completing your patriotic American flag․
Detailed Pattern: American Flag Applique
Free crochet applique patterns simplify creating miniature flags! Lovable Loops offers a quick and easy design, perfect for embellishing hats, bags, or garments with patriotic flair․
Creating the Flag Shape
To begin the applique, start with a chain that determines the flag’s length․ Then, work rows of single or double crochet to establish the rectangular flag base․ Carefully follow the free pattern instructions from sources like Lovable Loops for precise dimensions․
Maintain consistent tension throughout to achieve a neat, even shape․ Consider using a slightly smaller hook size for a denser fabric, preventing gaps․ Once the rectangle is complete, you’ll prepare for adding the iconic stars and stripes, bringing your patriotic crochet project to life!
Crocheting the Stars (Different Methods)
Free patterns offer diverse star-creation techniques! Some utilize simple single crochet increases to form five points, while others employ more intricate methods like working in rounds․ The Turtle Trunk’s tutorial showcases detailed star construction․
Alternatively, you can crochet flat stars separately and then sew them onto the flag․ Experiment with different yarn colors for a visually appealing effect․ Remember to maintain consistent star size for a polished look, enhancing the overall patriotic design of your American flag applique․
Attaching the Applique to a Project
Securely attaching your crocheted American flag applique requires careful attention․ Use a yarn needle and matching yarn color to sew the applique onto your chosen project, ensuring a seamless blend․ Employ a whip stitch or blanket stitch for durability and a neat finish․
For heavier fabrics, consider a stronger stitch․ Lovable Loops’ free pattern emphasizes secure attachment․ Reinforce corners and edges to prevent unraveling, preserving the patriotic beauty of your handcrafted American flag design for years to come․
Video Tutorials for American Flag Crochet
Free video tutorials simplify American flag crochet! Jayda InStitches2 offers a comprehensive guide, while The Turtle Trunk provides helpful instructional videos․
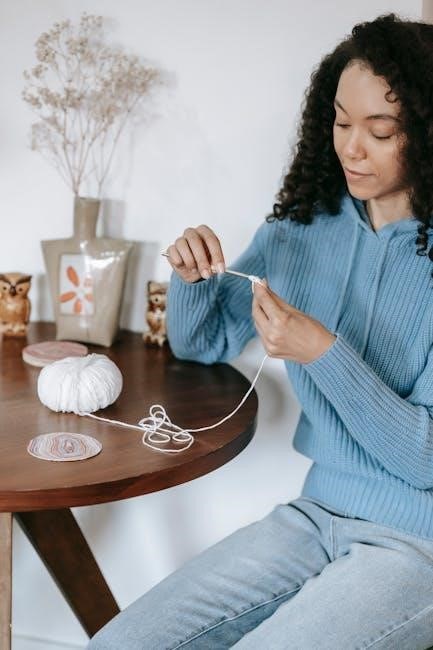
Beginner-Friendly Tutorials
For newcomers to crochet, several free tutorials break down American flag projects into manageable steps․ Lovable Loops’ applique pattern is exceptionally accessible, with clear visual guidance․
Many YouTube channels offer slow-paced demonstrations of basic stitches crucial for flag construction, like single and double crochet․ These resources focus on building confidence with foundational techniques before tackling the more complex star field or chevron stripes․
Look for tutorials specifically mentioning “beginner” or “easy” in the title to find the most supportive learning experiences․
Advanced Techniques Tutorials
Experienced crocheters seeking a challenge will find tutorials focusing on intricate American flag details․ These often cover advanced stitchwork for realistic flag textures, like ribbed stripes mimicking wind-blown fabric․
Mastering star creation is a key advanced skill; tutorials demonstrate various methods, from complex star stitch patterns to precise applique techniques․ Some resources explore colorwork strategies for seamless transitions between red, white, and blue sections․
Explore tutorials that delve into shaping and blocking to achieve a professional, polished finish for your patriotic creation․
Specific Pattern Tutorials (e․g․, The Turtle Trunk)
The Turtle Trunk offers a highly detailed, free American Flag blanket crochet pattern, complete with a video tutorial․ This resource breaks down the chevron stripes and star field construction step-by-step, ideal for visual learners․
Other designers, like Cheryl Miller, provide patterns for American Flag shawls, offering alternative project ideas․ Lovable Loops features an applique pattern, perfect for adding a patriotic touch to various items․
These tutorials often include stitch counts and helpful tips for achieving a clean, professional finish․
Tips for Achieving a Clean and Professional Finish
Weaving in loose ends securely and blocking the finished American flag project are crucial for a polished look and maintaining its shape․
Weaving in Ends
After completing your American flag crochet project, meticulously weave in all yarn ends to prevent unraveling and create a neat appearance․ Use a yarn needle to carefully thread the ends back through several stitches on the wrong side of the work․
Avoid pulling too tightly, which can distort the fabric․ Secure each end by changing direction and weaving it back in a different area․ This technique ensures a durable and professional finish, especially important for displaying patriotic crochet items!
Blocking the Finished Project
Blocking your completed American flag crochet piece enhances its shape and drape, resulting in a polished look․ Gently wet the project, then pin it to a blocking board or towel, shaping it to the desired dimensions․
Allow it to dry completely; this process evens out stitches and defines the flag’s form․ Blocking is particularly beneficial for larger projects like blankets, ensuring a professional and visually appealing final product, worthy of patriotic display!
Maintaining the Shape and Color of the Flag
To preserve your crocheted American flag’s vibrant colors and shape, hand wash gently with cool water and a mild detergent․ Avoid harsh chemicals or bleach, which can fade the yarn․
Lay flat to dry, away from direct sunlight to prevent color bleeding․ Periodic re-blocking can help restore the flag’s form if it becomes distorted over time, ensuring its patriotic beauty endures for years to come!
Troubleshooting Common Issues
Crochet flags may experience uneven stripes or star placement․ Carefully review stitch counts and pattern instructions to correct these common errors during construction․
Uneven Stripes
Uneven stripes are a frequent challenge when crocheting an American flag․ Maintaining consistent tension is crucial; varying tension leads to width discrepancies in each stripe․ Double-check your stitch count at the end of every row to ensure accuracy, preventing gradual widening or narrowing․
If stripes become uneven, consider carefully unraveling back to the point of the error․ Blocking the finished flag can sometimes help even out minor inconsistencies, but prevention is key․ Consistent hook size usage is also vital!
Incorrect Star Placement
Incorrect star placement can significantly impact the American flag’s appearance․ Carefully follow the pattern’s chart or instructions for precise positioning․ Using stitch markers to delineate star rows and columns is highly recommended, preventing accidental miscounts or shifts․
When creating the star field, work slowly and deliberately․ Double-check each star’s location before completing it․ If errors occur, gently unravel and reposition, ensuring accurate representation of the flag’s iconic design․
Difficulty with Stitch Counts
Difficulty with stitch counts is a common challenge in American flag crochet patterns, especially with complex designs like chevron stripes or star fields․ Regularly count your stitches at the end of each row to ensure accuracy․ Utilize stitch markers to delineate pattern repeats and maintain consistent counts․
Refer back to the free pattern’s instructions frequently, and don’t hesitate to unravel sections if discrepancies arise․ Precise stitch counts are crucial for achieving a well-shaped and proportional flag․
Variations and Customization
Free patterns allow for creative adjustments! Experiment with different yarn weights, add decorative borders, or incorporate textured stitches for a unique American flag design․
Adding Borders
Crochet borders elevate your American flag project, providing a polished finish and enhancing its durability․ Simple single crochet edging offers a clean look, while shell stitch borders introduce texture and visual interest․
Consider a contrasting color for the border to define the flag’s edges or utilize the same blue from the star field for a cohesive design․ Experiment with picot stitch or rope borders for added flair, customizing your free pattern creation․
Using Different Yarn Weights
Adapting free American flag crochet patterns with varying yarn weights dramatically alters the final project’s size and texture․ Bulky yarn creates a quick, cozy blanket, while sport weight yarn yields a more delicate, intricate design․
Remember to adjust your hook size accordingly to maintain gauge․ Thicker yarns require larger hooks, and finer yarns necessitate smaller hooks․ This ensures accurate stitch counts and a proportionally correct flag representation․
Incorporating Textured Stitches
Elevate your free American flag crochet pattern by introducing textured stitches! Bobble, popcorn, or cable stitches can simulate the waving effect of the flag, adding visual depth and interest․
Experiment with front and back post stitches to create ribbed stripes, mimicking the flag’s fabric texture․ These techniques require careful stitch placement, but the resulting dimension significantly enhances the patriotic aesthetic of your finished piece․
Resources for More Free Patterns
Yarnspirations, Lovable Loops, and Ravelry offer extensive libraries of free crochet instructions, including numerous American flag designs for varied skill levels!
Yarnspirations
Yarnspirations stands as a premier online destination for free crochet patterns, boasting an impressive selection catering to all skill levels․ Their collection includes the “Aunt Lydias American Pride Flag” pattern, alongside over 10,000 other easily followed guides․
You’ll discover a diverse range of American flag projects, from intricate blankets to smaller decorative items․ The website provides clear instructions and helpful visuals, making it ideal for both beginners and experienced crocheters seeking patriotic inspiration․ Explore their extensive library to find your next project!
Lovable Loops
Lovable Loops is a fantastic resource for free crochet patterns, notably featuring a readily available American Flag Applique Pattern․ This pattern is described as quick and easy to complete, making it perfect for adding a patriotic touch to various projects․
The site offers detailed written instructions, ensuring clarity for crocheters of all abilities․ Lovable Loops consistently provides accessible and charming designs, and their American flag applique is a wonderful starting point for patriotic crafting endeavors!
Ravelry
Ravelry serves as a comprehensive online community and database for knitters and crocheters, offering a vast collection of free and paid American flag crochet patterns․ Users can explore numerous designs, filter by skill level, and access project pages with helpful tips and modifications․
The platform’s robust search functionality allows you to pinpoint specific patterns, including blankets, appliqués, and more․ Ravelry fosters a collaborative environment where crafters share their creations and provide valuable feedback, enhancing the crochet experience․
American Flag Crochet for Patriotic Holidays
Free American flag crochet patterns are ideal for crafting festive décor for Memorial Day, Independence Day, and Veterans Day celebrations, showcasing patriotic pride!
Memorial Day Projects
Crochet an American flag blanket as a thoughtful tribute to fallen heroes, utilizing free patterns from sites like Lovable Loops and The Turtle Trunk․ Consider smaller projects like American flag appliqués to adorn wreaths or memorial decorations․
These free instructions allow for personalized touches, creating heartfelt keepsakes․ Yarnspirations offers numerous free options, perfect for beginners․ A simple American flag coaster or pot holder also makes a lovely, respectful gesture․ Remember to choose durable yarn for outdoor displays!
Independence Day Projects
Celebrate the Fourth of July with vibrant crochet American flag creations! Utilize free patterns from resources like Lovable Loops and The Turtle Trunk to craft festive decorations․ Consider a cheerful American flag table runner or placemats for your holiday picnic․
Smaller projects, like free appliqué designs for tote bags or festive banners, add patriotic flair․ Yarnspirations provides numerous free options․ A quick American flag headband is a fun accessory!
Veterans Day Projects
Show your gratitude and honor our veterans with heartfelt crochet American flag projects! Free patterns from sites like Yarnspirations and The Turtle Trunk enable you to create meaningful gifts․ Consider a comforting American flag blanket, offering warmth and patriotism․
Smaller tributes, such as free appliqué designs for pillows or lap blankets, demonstrate respect․ Lovable Loops offers accessible patterns․ A simple American flag coaster set is a thoughtful gesture․