Power Pressure Cooker XL Manual: A Comprehensive Guide
This manual provides essential guidance for safe and effective operation of your Power Pressure Cooker XL‚ covering models PPC770 and PCXL-PRO6.
It details cooking procedures‚ cleaning‚ and troubleshooting‚ ensuring optimal performance and delicious results with this versatile kitchen appliance.
Welcome to the world of convenient and efficient cooking! The Power Pressure Cooker XL is designed to revolutionize your kitchen experience‚ offering a faster‚ safer‚ and healthier way to prepare your favorite meals. This appliance combines the functionality of a pressure cooker‚ slow cooker‚ rice cooker‚ steamer‚ and more‚ all in one versatile unit.
Whether you’re a seasoned chef or a beginner cook‚ the Power Pressure Cooker XL simplifies meal preparation. It utilizes pressure cooking technology to significantly reduce cooking times‚ preserving vital nutrients and flavors. Models like the PPC770 and PCXL-PRO6 boast pre-programmed settings for various dishes‚ including soups‚ stews‚ beans‚ and even pressure canning – reaching pressures up to 82.7kpa (11.99psi) for safe food preservation.
This manual serves as your comprehensive guide‚ providing detailed instructions on operation‚ safety precautions‚ and maintenance. Prepare to unlock a world of culinary possibilities with your new Power Pressure Cooker XL!
Understanding Your Model: PPC770 & PCXL-PRO6
Both the PPC770 and PCXL-PRO6 models of the Power Pressure Cooker XL share core functionalities‚ designed for efficient multi-purpose cooking. However‚ understanding their specific features is key to maximizing performance. Both utilize electric pressure cooking‚ with default pressures around 50kpa (7.2psi) for standard programs. This ensures consistent results for everyday meals.
A significant feature is the pressure canning program‚ capable of reaching 82.7kpa (11.99psi)‚ crucial for safe food preservation. The PCXL-PRO6 PRO XL‚ as detailed in available manuals‚ offers a user-friendly control panel and a robust build. Regardless of the model‚ familiarizing yourself with the components – lid‚ sealing ring‚ inner pot‚ and steam rack – is essential.
Refer to the included owner’s manual for detailed diagrams and specific operational nuances of your particular model. Proper understanding will unlock the full potential of your Power Pressure Cooker XL.
Safety Precautions
Prioritizing safety is paramount when operating your Power Pressure Cooker XL. Always read the entire manual before first use‚ paying close attention to warnings and instructions. Never attempt to force open the lid while pressure is present; allow for natural pressure release or carefully use the quick release function as directed.
Ensure the sealing ring is correctly positioned and in good condition to maintain a secure seal. Avoid overfilling the inner pot‚ as this can cause blockage and pressure buildup. Keep the cooker away from flammable materials and water sources.
Regularly inspect the power cord for damage and never operate the cooker with a damaged cord. Always unplug the unit when not in use and before cleaning. Following these precautions will ensure safe and enjoyable cooking experiences.
Important Safety Instructions
To prevent injury or damage‚ heed these crucial safety instructions. Never immerse the cooker base‚ cord‚ or plug in water or other liquids. Hot surfaces can cause burns – use oven mitts when handling the lid and inner pot during or after cooking.
Do not operate the appliance if it has a damaged cord or plug‚ or if it is malfunctioning. Repairs should only be performed by qualified personnel. Keep the cooker out of reach of children.
Always ensure proper ventilation during operation. Never use the cooker for anything other than its intended purpose. Be cautious when releasing pressure‚ as hot steam can escape. Failure to follow these instructions could result in serious consequences.
Electrical Safety Guidelines
To ensure safe operation‚ adhere to these electrical safety guidelines. Always plug the Power Pressure Cooker XL into a grounded electrical outlet. Avoid using extension cords‚ as they may not be rated for the appliance’s power requirements.
Never operate the cooker with wet hands. Inspect the power cord regularly for damage‚ and discontinue use if any damage is detected. Do not attempt to disassemble or repair the appliance yourself; contact qualified service personnel for assistance.
Ensure the voltage of your outlet matches the appliance’s specifications. Unplug the cooker from the outlet when not in use and before cleaning. Proper electrical safety practices are essential to prevent shocks and hazards.

Getting Started
Before your first culinary adventure‚ proper preparation is key! This section guides you through cleaning‚ component identification‚ and understanding the control panel features.
Before First Use: Cleaning and Preparation
Prior to the initial use of your Power Pressure Cooker XL‚ a thorough cleaning process is absolutely essential. This ensures the removal of any manufacturing residues and guarantees a safe and hygienic cooking experience. Begin by carefully washing the inner pot and steam rack with warm‚ soapy water. Rinse them completely and dry them thoroughly before placing them back into the cooker.
Next‚ meticulously clean the lid and sealing ring. The sealing ring is particularly important as it creates the airtight seal necessary for pressure cooking. Ensure it is free from any debris or damage. Wipe down the exterior of the cooker with a damp cloth. Do not immerse the cooker base in water‚ as this could cause electrical hazards.
It’s recommended to perform a test run with water only‚ to familiarize yourself with the cooker’s operation and to further eliminate any lingering odors. This initial preparation will set you up for successful and enjoyable pressure cooking!
Component Identification

Familiarizing yourself with the components of your Power Pressure Cooker XL is crucial for safe and efficient operation. The primary components include the cooker base‚ the inner pot – where food is placed for cooking – and the steam rack‚ used to elevate food above the water level.
The lid is designed to create a secure‚ airtight seal‚ and features the sealing ring‚ a vital element for building pressure. Understanding how these parts interact is key. The control panel‚ discussed separately‚ manages the cooking functions.

Proper assembly is essential; ensure the lid is correctly aligned and locked before each use. Regularly inspect the sealing ring for wear and tear‚ replacing it when necessary to maintain optimal performance; Knowing each part’s function will enhance your cooking experience and ensure longevity of your appliance.
Lid and Sealing Ring
The lid of your Power Pressure Cooker XL is engineered for a secure‚ airtight seal‚ vital for building and maintaining pressure during cooking. It features locking mechanisms to ensure it’s properly fastened before operation. Always verify a complete seal before starting any cooking program.
The sealing ring‚ typically made of silicone‚ creates this airtight closure. It’s a crucial component and should be inspected before each use for cracks‚ tears‚ or deformation. A damaged sealing ring will prevent proper pressure build-up.
Regular cleaning is essential; hand wash the sealing ring with mild soap and water. Over time‚ the sealing ring may absorb odors or lose elasticity‚ requiring replacement for optimal performance. Proper care of these components guarantees safe and effective pressure cooking.
Inner Pot and Steam Rack
The inner pot‚ usually constructed from stainless steel‚ is where food is placed for cooking within the Power Pressure Cooker XL. It’s designed for even heat distribution and is removable for easy cleaning. Avoid using abrasive cleaners that could damage the surface.
The steam rack is a vital accessory‚ particularly when steaming or cooking delicate foods. It elevates the food above the water level‚ preventing sticking and ensuring even cooking. It’s also useful for warming food without overcooking.
Both components are dishwasher safe‚ simplifying cleanup. Ensure the inner pot is correctly seated within the cooker before use. Regularly inspect the steam rack for any damage or corrosion‚ replacing it if necessary to maintain optimal cooking results and food safety.
Control Panel Overview
The control panel of your Power Pressure Cooker XL is designed for intuitive operation. It features a digital display and several function buttons‚ allowing you to select various cooking programs and customize settings.
Key elements include the power button‚ program selection buttons (Soup/Broth‚ Meat/Stew‚ Bean/Chili‚ etc.)‚ a timer adjustment function‚ and pressure level controls. The display indicators show the current cooking status‚ remaining time‚ and selected pressure level.
Understanding these controls is crucial for maximizing the cooker’s versatility. Familiarize yourself with each button’s function before use. The default pressure for cooking programs is typically 50kpa (7.2psi)‚ with a dedicated program for pressure canning at 82.7kpa (11.99psi).
Function Buttons Explained
Each button on the Power Pressure Cooker XL’s control panel serves a specific purpose. The ‘Soup/Broth’ button initiates a program optimized for flavorful liquid-based dishes. ‘Meat/Stew’ is designed for tenderizing tougher cuts‚ while ‘Bean/Chili’ provides ideal settings for legumes.
The ‘Pressure Cook’ button allows for manual pressure cooking‚ giving you full control over time and pressure. A dedicated ‘Cancel’ button halts the cooking process‚ and ‘Start’ initiates the selected program. Timer adjustment buttons increase or decrease cooking duration.
Crucially‚ the pressure canning program operates at 82.7kpa (11.99psi)‚ essential for safe food preservation. Remember that default pressure for other programs is 50kpa (7.2psi). Understanding these functions ensures safe and efficient operation;
Display Indicators
The Power Pressure Cooker XL’s display panel provides crucial information during operation. A prominent timer display shows remaining cooking time‚ adjustable via the timer buttons. Pressure level indicators clearly show the current pressure inside the cooker‚ vital for safety and recipe accuracy.
Status indicators illuminate to signal different phases of the cooking cycle – ‘Preheat’‚ ‘Pressure Cooking’‚ and ‘Keep Warm’. Error codes‚ should they appear‚ are displayed to assist in troubleshooting common issues. The ‘Delay Start’ indicator confirms when the delayed cooking function is activated.
Pay attention to the locking indicator‚ confirming the lid is securely sealed before pressure builds. Understanding these indicators ensures safe and effective use of your Power Pressure Cooker XL‚ maximizing its versatility and convenience.

Cooking with Your Power Pressure Cooker XL
Explore diverse recipes using pre-set programs or manual controls‚ achieving flavorful results quickly and efficiently with your Power Pressure Cooker XL;
Pressure Cooking Basics
Pressure cooking utilizes sealed‚ high-temperature steam to cook food faster than conventional methods. The Power Pressure Cooker XL maintains a consistent pressure‚ typically around 50kPa (7.2psi) for standard cooking programs‚ significantly reducing cooking times.
Before starting‚ ensure the sealing ring is properly installed in the lid for a secure closure. Add liquids – broth‚ water‚ or sauce – to create steam; the minimum amount varies by recipe;
Select your desired program or manually set the time and pressure. Once pressure is reached‚ the cooker will maintain it for the set duration‚ then release pressure naturally or via quick release (use caution!).
Understanding pressure release is crucial: natural release allows for tenderizing‚ while quick release is faster but may affect texture. Always follow recipe guidelines for optimal results and safety.
Cooking Programs
The Power Pressure Cooker XL features pre-programmed settings for convenient cooking. The Soup/Broth Program is ideal for flavorful stocks and soups‚ utilizing a longer cooking time for optimal ingredient infusion.
The Meat/Stew Program excels at tenderizing tougher cuts of meat‚ delivering fall-off-the-bone results. The Bean/Chili Program is specifically designed for perfectly cooked beans and hearty chili‚ ensuring they are tender without being mushy.
These programs automatically adjust cooking time and pressure‚ simplifying the process. However‚ remember the default pressure is 50kPa (7.2psi). For specific recipes‚ adjustments may be needed.
Experiment with these programs and consult recipes for best results. The cooker also offers a dedicated pressure canning program‚ reaching 82.7kPa (11.99psi)‚ for safe food preservation.
Soup/Broth Program
Utilizing the Soup/Broth Program on your Power Pressure Cooker XL allows for the creation of rich‚ flavorful stocks and soups with minimal effort. This program is designed for extended cooking times at a consistent pressure‚ effectively extracting maximum flavor from bones‚ vegetables‚ and meats.
The default pressure setting for this program is 50kPa (7.2psi)‚ providing a gentle yet thorough cooking process. For particularly tough ingredients‚ consider increasing the cooking time slightly.
Remember to always ensure sufficient liquid is present to prevent scorching. This program is perfect for chicken‚ beef‚ or vegetable broths‚ as well as hearty soups like minestrone or French onion.
Experiment with different ingredient combinations and seasonings to create your signature soup or broth recipes‚ enjoying the convenience and efficiency of your Power Pressure Cooker XL.
Meat/Stew Program
The Meat/Stew Program on your Power Pressure Cooker XL is expertly designed to tenderize tougher cuts of meat and create flavorful‚ hearty stews. This program utilizes a pre-set cooking time and pressure – typically 50kPa (7.2psi) – to break down connective tissues‚ resulting in incredibly tender and succulent results.
It’s ideal for beef‚ pork‚ lamb‚ and even poultry. When using this program‚ ensure meat is browned before pressure cooking for enhanced flavor. Adding vegetables like carrots‚ potatoes‚ and onions alongside the meat creates a complete and satisfying stew.
Adjust cooking times based on the size and type of meat. For larger cuts‚ a longer cooking duration may be necessary. Remember to always follow safety guidelines and ensure sufficient liquid is present to prevent burning.
Bean/Chili Program
The Bean/Chili Program on the Power Pressure Cooker XL streamlines the process of cooking beans and creating delicious chili. This program pre-sets the cooking time and pressure – generally at 50kPa (7.2psi) – to perfectly soften beans without requiring pre-soaking‚ saving you valuable time.
It’s fantastic for kidney beans‚ black beans‚ chickpeas‚ and other varieties. When making chili‚ this program allows flavors to meld beautifully‚ resulting in a rich and robust dish. Ensure sufficient liquid covers the beans to prevent burning and achieve optimal texture.
Adjust cooking times slightly depending on the bean type and desired consistency. Always follow safety precautions and allow for natural pressure release for best results. Enjoy perfectly cooked beans and flavorful chili with ease!
Manual Pressure Cooking
Manual pressure cooking offers complete control over cooking time and pressure levels‚ allowing for customized recipes and experimentation. This feature bypasses the pre-programmed settings‚ enabling you to set the desired pressure (typically 50kPa/7.2psi for general cooking‚ or 82.7kPa/11.99psi for pressure canning) and cooking duration manually.
It’s ideal for recipes not covered by the automatic programs or when you prefer a specific cooking profile. Carefully monitor the cooking process and adjust settings as needed. Remember to factor in the time it takes to reach pressure and the subsequent pressure release method – natural or quick release.
Always consult reliable recipes and understand the impact of pressure and time on different ingredients. Mastering manual pressure cooking unlocks the full potential of your Power Pressure Cooker XL.
Pressure Canning (82.7kpa / 11.99psi)
Pressure canning utilizes high heat – 82.7kPa / 11.99psi – to safely preserve low-acid foods like vegetables‚ meats‚ and seafood. This process eliminates harmful bacteria that can thrive in room temperature conditions‚ ensuring long-term storage. Always follow tested canning recipes from reputable sources‚ such as the USDA Complete Guide to Home Canning.
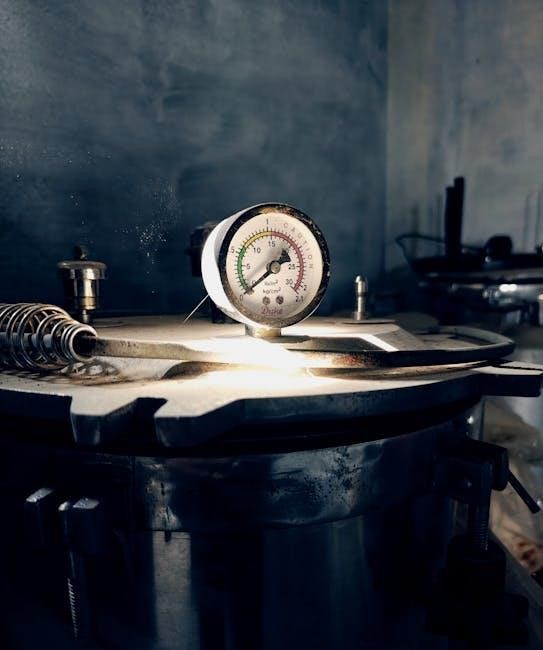
Proper canning requires precise timing and adherence to safety guidelines. Ensure the sealing ring is correctly positioned and the lid is securely locked. Monitor the pressure gauge throughout the canning process to maintain the required 82.7kPa/11.99psi.
After processing‚ allow for a natural pressure release before carefully opening the lid. Improper canning can lead to spoilage and potential health risks; therefore‚ strict adherence to instructions is crucial.
Maintenance and Troubleshooting
Regular cleaning and addressing common issues like sealing problems or error codes are vital for maintaining your Power Pressure Cooker XL’s performance and longevity.
Cleaning and Care
Maintaining your Power Pressure Cooker XL requires regular cleaning to ensure optimal performance and longevity. Always unplug the cooker and allow it to cool completely before cleaning. The inner pot and steam rack are dishwasher safe‚ offering convenient cleaning. However‚ hand washing is also suitable using warm‚ soapy water.
The lid and sealing ring require careful attention; Remove the sealing ring after each use and wash it thoroughly with soap and water; inspect for cracks or damage and replace if necessary. The lid itself can be wiped clean with a damp cloth. Avoid abrasive cleaners‚ as they can damage the surface.
The exterior of the cooker can be cleaned with a soft‚ damp cloth. Never immerse the cooker base in water or any other liquid. Ensure all parts are completely dry before reassembling and storing. Proper cleaning prevents food buildup and ensures hygienic cooking.
Troubleshooting Common Issues
Encountering issues with your Power Pressure Cooker XL? A common problem is a lid that won’t seal. Ensure the sealing ring is correctly positioned and free from debris. Also‚ verify the steam release valve is in the sealing position. If the issue persists‚ try cleaning the sealing surfaces of both the lid and the cooker body.
Error codes displayed on the control panel indicate specific problems. Refer to the manual for a complete list of error codes and their corresponding solutions. Common errors might relate to insufficient liquid‚ overpressure‚ or sensor malfunctions.
If food is burning‚ reduce cooking time or add more liquid. Always ensure adequate liquid is used‚ especially during pressure cooking. For any unresolved issues‚ consult the user manual or contact customer support for assistance.
Lid Won’t Seal
A lid that fails to seal is a frequent concern with pressure cookers. First‚ meticulously inspect the sealing ring‚ ensuring it’s properly seated within the lid’s rim. Any twists‚ cracks‚ or debris can prevent a secure closure. Clean the sealing ring thoroughly with warm‚ soapy water and ensure it’s completely dry before reinstallation.
Next‚ verify the steam release valve is positioned correctly – it must be in the ‘sealing’ or ‘closed’ position. Confirm there’s no food particle obstruction around the lid’s rim or the cooker body’s edge. A clean‚ smooth surface is crucial for a proper seal.
Finally‚ ensure the lid is securely locked into place. Sometimes‚ a slight adjustment or re-locking can resolve the issue. If problems persist‚ consult the full manual for detailed diagrams and troubleshooting steps.
Error Codes
The Power Pressure Cooker XL utilizes error codes to indicate specific issues during operation. While the manual provides a comprehensive list‚ understanding common codes is helpful. “E1” often signals a problem with the temperature sensor‚ potentially requiring service. “E2” typically indicates a lid sealing issue‚ prompting a check of the sealing ring and lid alignment.
“E3” can signify a low-water condition or overheating‚ demanding immediate attention and a review of liquid levels. Other codes may relate to pressure sensor malfunctions or internal component failures.
If an error code appears‚ immediately stop the cooking process and consult the manual for the specific code’s meaning and recommended solution. Do not attempt to disassemble or repair the unit yourself; contact customer support for assistance.